
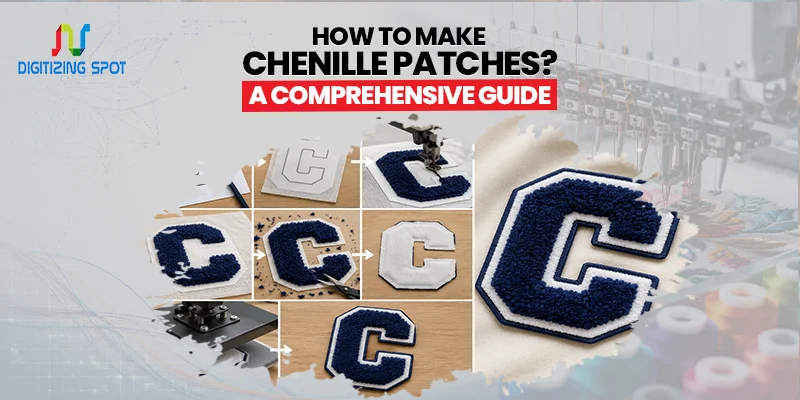
How To Make Chenille Patches? A Comprehensive Guide
Have you ever wanted to make chenille patches but did not know where to begin? Many people struggle with choosing the right fabric, yarn, or embroidery settings. Others end up with patches that look uneven, shed too much, or do not last after washing. These problems can waste time and money, especially if you are making patches for a clothing brand, school, or sports team.
The best thing is that making chenille patches is much easier when you follow the right process. In the next 8 minutes, you’ll discover how to make chenille patches. You’ll find the tools you need and some easy tips for clean, soft, and durable results.
What Are Chenille Patches?
Chenille patches are thick, soft embroidered patches made with looped yarn that creates a fuzzy texture. They are easy to recognize because of their raised look and rich feel. These patches have been popular for decades on varsity jackets, hoodies, sports uniforms, backpacks, and fashion apparel. If you want a premium, rugged look with long-lasting durability, consider our custom leather patches.
Today, many clothing brands also use chenille patches to give their products a premium look. The soft texture makes chenille patches stand out more than flat embroidery, making them a great choice for bold letters, logos, and simple artwork.
Materials Needed to Make Chenille Patches
Before you begin, gather all the materials you need. Using quality supplies will help you get better results. You will need:
- Chenille embroidery machine
- Embroidery backing
- Chenille yarn
- Twill fabric or felt
- Embroidery digitized file
- Sharp scissors or laser cutter
- Heat seal or sew-on backing
- Embroidery thread for borders
Order Your Custom Patch Now!
Step 01: Create the Patch Design
The first step is creating a simple design. Chenille works best with large shapes, bold letters, and thick outlines. Very small details can disappear under the yarn, so keep the artwork clean and easy to read.
Many businesses use professional embroidery digitizing to prepare their artwork for chenille machines. A properly digitized file tells the machine exactly where to place the yarn and stitches. Good artwork always leads to better-looking patches.
Step 02: Choose the Right Fabric
Your base fabric supports the entire patch. Twill is one of the most common choices because it is durable and smooth. Felt is another popular option that gives the patch a classic appearance. The fabric should be strong enough to hold the thick chenille yarn without stretching during embroidery. A stable foundation helps produce clean edges and even stitching. If you need waterproof, flexible patches that stand up to tough conditions, consider our custom pvc patches.
Step 03: Digitize the Design
Chenille embroidery is different from regular embroidery. The design must be digitized specifically for chenille stitching. The software tells the embroidery machine where to create loops, chain stitches, and borders. Proper digitizing also controls stitch direction and yarn density. If the file is not prepared correctly, the patch may look uneven or have empty spaces.
Step 04: Prepare the Embroidery Machine
Once the file is ready, load it into the embroidery machine. Install the correct chenille needles and yarn colors before starting. Secure the fabric tightly in the frame so it stays flat during stitching. Always run a sample patch first. Testing the design helps you catch any problems before starting a full production run.
Step 05: Stitch the Chenille Yarn
Now the embroidery machine begins building the patch. The machine places soft loops of chenille yarn over the design while chain stitches hold everything in place. Watch the first patch carefully. If the yarn tension is too loose or too tight, adjust the machine before continuing. A well-adjusted machine creates full, even, and soft chenille stitching.
Step 06: Add the Embroidered Border
After the chenille area is complete, the machine stitches the outer border. Most chenille patches use a satin border because it keeps the edges clean and prevents fraying. The border also gives the patch a finished appearance. Choose a thread color that matches or contrasts with the chenille for a bold look. If you want eye-catching patches with extra sparkle and shine, consider our custom sequin patches.
Step 07: Cut the Patch
After embroidery is finished, remove the patch from the fabric. The patch can be trimmed by hand with sharp scissors or cut using a laser machine for perfect edges. Clean cutting is important because rough edges can make even a great patch look unfinished.
Step 08: Apply the Backing
The final step is adding the backing. There are several backing options depending on how the patch will be used. Sew-on backing is the strongest choice for jackets and uniforms. Heat seal backing allows the patch to be attached with a heat press or household iron. Hook and loop backing works well for military uniforms and tactical gear. Choose the backing that fits your project.
Common Mistakes to Avoid
Many beginners make simple mistakes that affect the final result. One common problem is using artwork with too many tiny details. Chenille yarn is thick, so small text may not be visible. Another mistake is using poor-quality yarn. Low-quality materials can shed, fade, or lose their softness over time. Improper digitizing is another major issue.
Even the best machine cannot produce a good patch from a poor embroidery file. Skipping the sample stitch test can also lead to wasted materials. Taking time to test your design saves both money and production time.
Where Are Chenille Patches Used?
Chenille patches are popular in many industries because they are soft, stylish, and durable.
- Schools use them for varsity jackets.
- Sports teams add them to uniforms.
- Fashion brands place them on hoodies, denim jackets, caps, and sweatshirts.
- Businesses use chenille patches for promotional apparel.
- Many streetwear brands also choose chenille patches because they give clothing a bold, premium appearance.
Need Help To Create Custom Patch Right Now!
Should You Make Chenille Patches Yourself?
Making chenille patches can be a fun project if you already have the right equipment and experience. However, professional production requires special embroidery machines, quality digitizing, and skilled operators.
If you need patches for your business or clothing brand, working with an experienced patch company often saves time and gives more consistent results. A trusted supplier can also provide fast response, high-quality materials, and expert support from start to finish.
Why Choose Digitizing Spot?
At Digitizing Spot, we help businesses, clothing brands, schools, and sports teams make high-quality chenille patches. We focus on care and precision. Our team uses ready-to-go digitizing, high-quality materials, and thorough checks. This way, we deliver patches that look fantastic and last long. We provide competitive prices and fast turnaround times, whether you need one design or a big order. You also get a free quote before production starts. Our goal is to make the ordering process simple while delivering results you can trust.
Conclusion
Chenille patches are a great way to give clothing a bold and classic look. Choose the right materials, keep the design simple, and digitize properly. Follow each step carefully. This way, you can make patches that are soft, durable, and eye-catching. If you want professional chenille patches without the hassle of making them yourself, Digitizing Spot is ready to help. Contact us today and get your free quote.
Get A Custom Quote
Frequently Asked Questions
Twill and felt are the most popular choices.
Yes, but you need a chenille embroidery machine and proper supplies.
Yes. Quality chenille patches can last for years with proper care.
Sew-on backing offers the strongest hold.
Yes, if they have heat-seal backing.
Digitizing tells the machine how to stitch the design correctly.
Yes. Wash them gently to keep them looking their best.
Bold logos, letters, and simple shapes give the best results.
Production time depends on the design and order size.
Digitizing Spot offers custom chenille patches with fast turnaround and a free quote.
