
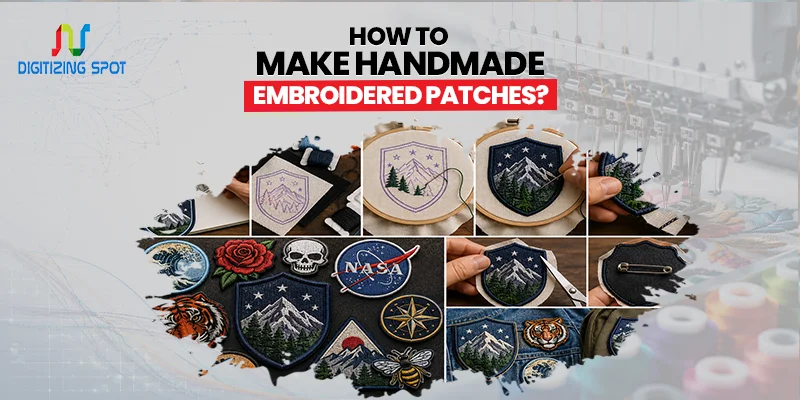
How to Make Handmade Embroidered Patches?
Handmade embroidered patches never go out of style. They add a personal touch to jackets, backpacks, hats, uniforms, and gifts while giving you complete control over the design. Whether you want to create a patch for fun, start a small craft business, or prepare artwork for professional production, learning the process is a useful skill.
The good news is that you don’t need expensive equipment to get started. With a few basic materials, some patience, and a little creativity, you can produce patches that look neat and last for years. You’ll also see when it makes sense to work with professionals for larger orders or detailed designs.
What Are Handmade Embroidered Patches?
Handmade embroidered patches are decorative pieces of fabric stitched with colourful thread to create logos, artwork, names, or symbols. Unlike machine-made patches, every stitch is completed by hand, giving each patch its own unique character. If you want classic, high-quality patches with detailed stitching, consider our custom embroidery patches.
People use handmade patches for fashion, clubs, school uniforms, gifts, sports teams, motorcycle groups, and branding. They are also popular among hobbyists who enjoy creating personalised accessories. Because every stitch is placed carefully, handmade patches often have a warm and authentic appearance that many people appreciate.
Materials You'll Need
Before you begin, gather the right materials. You’ll need a strong fabric such as cotton twill, felt, or canvas. Embroidery floss in your chosen colours is essential, along with embroidery needles and sharp fabric scissors.
You’ll also need an embroidery hoop to keep the fabric tight while stitching. A washable fabric marker or pencil helps transfer your design onto the fabric. If you plan to attach the patch later, prepare iron-on backing or adhesive backing or simply leave it ready for sewing. Good-quality materials make stitching easier and improve the finished result.
Order Your Custom Patch Now!
Step 01: Choose a Simple Design
Step 02: Transfer the Design
Draw your design directly onto the fabric using a washable fabric pen or transfer paper. Keep the lines light enough to cover with thread later. If you’re using a printed logo, tracing paper can make the transfer much easier. Check the design before you begin stitching because changing it later is much more difficult. If you’re looking for soft, textured patches with a bold vintage style, consider our custom chenille patches.
Step 03: Secure the Fabric
Place the fabric inside an embroidery hoop. The fabric should feel firm but not stretched so tightly that it becomes distorted. Keeping the fabric steady allows your stitches to remain even throughout the project. Take a few moments to adjust the hoop before you begin sewing.
Step 04: Select Your Stitch Types
Different stitches create different effects. The satin stitch fills larger areas with smooth thread. The backstitch produces clean outlines. The split stitch creates textured borders. French knots are excellent for tiny decorative details. Using a combination of stitches gives your handmade patch more depth and character.
Step 05: Begin Stitching
Start from the centre of your design and work outward. This helps prevent wrinkles and keeps the design balanced. Keep each stitch similar in length for a cleaner finish. Take your time. Handmade embroidery is about patience rather than speed. If the thread becomes twisted, stop and straighten it before continuing. If you want a premium finish for hats, jackets, or jeans, consider our custom leather patches.
Step 06: Fill Larger Areas
After completing the outline, begin filling larger sections. Work in one direction where possible so the stitches appear smooth and consistent. Avoid pulling the thread too tightly because it may cause the fabric to pucker. Neat filling makes the finished patch look much more professional.
Step 07: Cut Out the Patch
Once all stitching is complete, remove the fabric from the hoop. Carefully trim around the design, leaving a small border. Take your time while cutting to avoid damaging the embroidery. A sharp pair of scissors produces the cleanest edge.
Step 08: Finish the Edges
Finishing the edges prevents fraying. Many people use a blanket stitch around the outside. Others apply fabric glue before sewing the border. You can also use a satin stitch around the edge for a thicker finish. A neat border gives your patch a polished appearance.
Step 09: Attach the Backing
Now decide how your patch will be attached. Sew-on patches remain one of the strongest options. Iron-on backing offers quick application for many fabrics. Hook-and-loop backing works well for uniforms and tactical clothing. Choose the option that best matches how the patch will be used.
Step 10: Apply Your Handmade Patch
Once finished, your patch can be attached to jackets, bags, hoodies, caps, uniforms, or other fabric items. If sewing, use strong matching thread. If ironing, follow the manufacturer’s recommended temperature. Proper application helps your handmade patch remain secure after repeated use.
Need Help To Create Custom Patch Right Now!
Tips for Better Handmade Embroidered Patches
- Good lighting makes stitching much easier.
- Use shorter thread lengths to reduce tangling.
- Keep your hands clean to avoid marking light-coloured fabric.
- Practice basic stitches before attempting detailed artwork.
- Most importantly, don’t rush. Better results come from careful stitching.
When Professional Embroidery Is the Better Choice
Handmade patches are perfect for personal projects and small gifts. However, if you need consistent quality for business branding, uniforms, events, or large quantities, professional embroidery becomes the better option.
Professional embroidery offers cleaner stitching, colour consistency, quicker production, and accurate reproduction of logos. It also saves many hours when larger orders are required.
Conclusion
Making handmade embroidered patches is an enjoyable way to create personalised designs that can be worn, shared, or sold. By choosing simple artwork, using quality materials, and practising basic embroidery stitches, you can create patches that look attractive and last for years.
For larger orders or detailed business designs, working with an experienced embroidery digitising company gives you reliable quality and saves valuable time. At Digitizing Spot, we’re here to help with expert digitising services, professional patch production, and quick turnaround. Get your free quote today and let us help bring your ideas to life.
Get A Custom Quote
Frequently Asked Questions
Draw a design, stitch it onto fabric, trim the edges, and add your preferred backing.
Cotton twill, felt, and canvas are popular choices because they are durable and easy to stitch.
Backstitch for outlines and satin stitch for filling larger areas.
Yes. Simple designs are ideal for beginners learning basic embroidery.
Use a blanket stitch, satin stitch, or fabric sealant around the edges.
Yes, if iron-on backing has been added to the patch.
Yes. Properly stitched and attached patches can handle regular washing.
A simple patch may take one to three hours, depending on the design.
Yes. Many businesses create handmade samples before full production.
Digitizing Spot provides professional digitising services, quality patch production, and free quotes.
